Building a dazzling digital world in Roblox Studio often boils down to a fundamental choice: do you meticulously craft every wall, floor, and furniture piece by hand, or do you empower code to generate entire structures at your command? This isn't just a philosophical debate; the decision between Roblox condo building: manual methods vs. generators profoundly impacts your development speed, the uniqueness of your creations, and the scalability of your vision.
Whether you're dreaming of a cozy private hideaway, a sprawling apartment complex, or an entire city block, understanding these two distinct approaches is crucial. We're going to break down both the hands-on, artistic process and the programmatic, automated power, helping you decide which path—or blend—is right for your next Roblox masterpiece.
At a Glance: Manual vs. Generator Building
- Manual Building: Involves directly placing and manipulating parts in Roblox Studio using your mouse and keyboard. It's excellent for unique, detailed, and small-scale projects.
- Generator Building: Uses Lua scripts to programmatically create structures. It excels at speed, consistency, and scalability for large, repetitive, or dynamic environments.
- Learning Curve: Manual building is more intuitive for beginners. Generators require basic to intermediate Lua scripting knowledge.
- Efficiency: Manual is slower for large projects but offers precise control. Generators are incredibly fast for mass production once set up.
- Flexibility: Manual allows for on-the-fly artistic changes. Generators offer flexibility through parameterization, allowing quick variations by changing script inputs.
- Best Approach: Often, a hybrid method (generating basic structures and then detailing them manually) yields the most impressive and efficient results.
The Age-Old Question: Crafting Your Roblox Condo
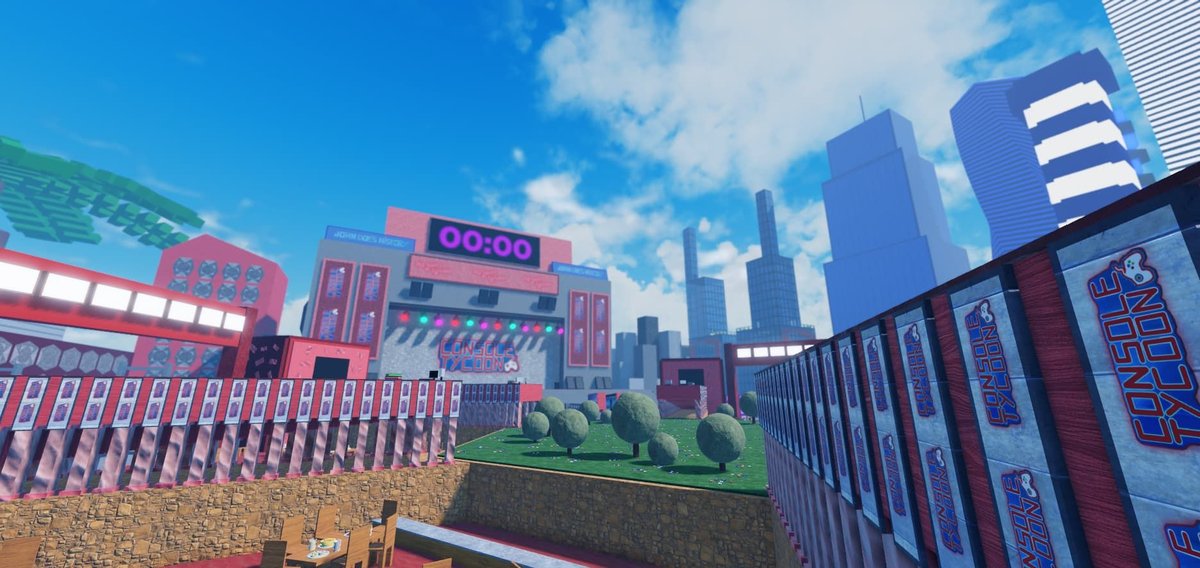
In the vibrant universe of Roblox, a "condo" is more than just a place to live; it's a social hub, a private retreat, or a customizable space within a larger game experience. From simple one-room apartments to multi-story luxury dwellings, Roblox condos offer players a sense of ownership and a platform for interaction. But before players can step inside, someone has to build them. This brings us to the core of our discussion: how you bring these structures to life within Roblox Studio.
The choice isn't just about speed; it's about control, creativity, and the long-term vision for your game. Do you prefer the sculptor's touch, molding every detail, or the architect's blueprint, dictating rules for an automated builder? Let's dive into each method.
Method 1: The Art of Manual Building – Hands-On Craftsmanship
Manual building is the traditional and most direct way to create anything in Roblox Studio. You, the builder, are in complete control, directly interacting with the 3D environment, selecting, positioning, sizing, and coloring every single part. It’s akin to building with digital LEGOs, piece by piece, exactly as you envision them.
When the Manual Touch Truly Shines
This method is ideal for projects that demand:
- Unique, Intricate Designs: When every corner, curve, and texture needs a specific, bespoke touch that a generic generator might struggle to replicate. Think of a highly themed role-play interior or a one-of-a-kind art installation.
- Small-Scale Projects: For a single condo, a small house, or a specific room within a larger game, the setup time for a generator might outweigh the benefits. Manual building gets you started immediately.
- Learning Fundamentals: It’s the best way for newcomers to grasp Roblox Studio’s interface, understand part properties, collision mechanics, and basic architectural principles within the engine. You learn by doing.
- Artistic Flow: Many creators enjoy the tactile process of shaping their world directly, allowing for spontaneous design changes and creative iterations as they build.
The Manual Blueprint: Your Step-by-Step Guide
Embarking on a manual build is a straightforward process, but success lies in thoughtful planning and execution.
- Envision and Plan Your Space: Before opening Studio, grab a pen and paper. Sketch your condo's layout: size, shape, number of rooms, corridors, where windows and doors will go, and amenities. This blueprint saves immense time and rework later.
- Choose Your Materials Wisely: Roblox offers a rich palette of materials (Plastic, SmoothPlastic, Wood, Concrete, Metal, Fabric, Glass, etc.) and color options.
- Mix Blocks and Bricks: Use basic
Partobjects for walls, floors, and structural elements. ConsiderWedgePartorCornerWedgePartfor sloped roofs or angled details. - Incorporate Props: Roblox's toolbox (or your own pre-made models) provides furniture, lighting, and decorative items to bring your condo to life. Use them to add character without clutter.
- Transparent Materials:
GlassorForceFieldmaterials can create realistic windows, adding depth and allowing light to pass through.
- Lay the Foundation: Start with a solid base. Create a large, flat
Partfor your floor. This will anchor your structure. Remember to always anchor static parts (Part.Anchored = true) immediately to prevent them from falling or collapsing due to gravity. - Build Walls and Floors:
- Duplicate your foundation part (Ctrl+D) or create new
Parts for your walls. - Position and resize them to form the outer perimeter and interior room divisions.
- Leave precise gaps for where doors and windows will eventually go.
- Ensure all walls are anchored.
- Add Ceilings and Roofs: Once your walls are in place, add ceiling parts for each room. For the exterior, construct a roof using flat parts, wedges, or a combination, depending on your desired aesthetic (flat, sloped, gabled).
- Integrate Doors and Windows:
- Use
Parts for window frames andGlassorForceFieldparts for the panes. - For doors, you can build them from
Parts and add handles, then group them into aModeland use aClickDetectorand a script to make them open and close. - Ensure these elements fit perfectly into the gaps you left in your walls.
- Decorate with Amenities: This is where your condo truly becomes a home. Add furniture, light fixtures, artwork, and small details. These can be simple
Parts you create or pre-made models from the toolbox. Don't forget to anchor static furniture too!
Manual Masterclass: Tips for Precision and Flair
- Use Layers for Depth: Don't just stack flat parts. For ceilings, consider adding thin trim pieces or even a second, slightly elevated layer for a more detailed look.
- Experiment with Colors and Materials: Don't stick to dull grays. Utilize the color palette and material browser to create a unique and inviting design. Blend
WoodPlankswithConcreteorFabricfor varied textures. - Grouping is Your Friend: Select related parts (e.g., all parts of a wall, or all parts of a chair) and press Ctrl+G to group them into a
Model. This keeps your Explorer organized and allows you to move, rotate, or duplicate entire sections easily. - Precision Tools: Use the "Move," "Scale," and "Rotate" tools with snap increments (found under the "Model" tab) for precise adjustments. The
Part.CFrameandPart.Sizeproperties in the Properties window allow for exact numerical input.
The Downsides of Doing It By Hand
While rewarding, manual building has its limitations:
- Time-Consuming: For large projects with many similar structures (e.g., a city block of condos), the sheer time commitment can be prohibitive.
- Repetitive and Tedious: Duplicating and slightly modifying hundreds of parts quickly becomes monotonous.
- Difficult to Scale: Expanding a manually built environment means going back and adding each new part individually.
- Inconsistencies: Maintaining perfect alignment, spacing, or identical features across many similar structures can be challenging, leading to subtle variations or errors.
- Updates are Painful: If you decide to change the height of all ceilings or the material of all walls across an entire complex, you'll need to manually adjust each one.
Method 2: The Power of Procedural Generation – Building with Code
Procedural generation (often simply called "generators" in this context) flips the manual process on its head. Instead of physically placing parts, you write Lua scripts that instruct Roblox Studio to create and arrange parts for you. This means you define the rules, and the code builds your world based on those rules. Learn more about Roblox condo generators and their inner workings to understand how these programmatic builders function at a deeper level.
When Procedural Generation Truly Shines
Generators are the go-to for projects that benefit from:
- Large-Scale Environments: Quickly create sprawling cities, multi-story buildings, or entire landscapes without placing a single part manually.
- Repetitive Structures: Perfect for generating apartment units, modular rooms, or identical building facades that need to be replicated numerous times.
- Rapid Prototyping and Iteration: Want to see what a building looks like with different dimensions, materials, or layouts? Just change a few variables in your script and regenerate it in seconds.
- Dynamic and Random Worlds: Create environments that change with each game session, offering unique experiences for players, or generating varied furniture layouts.
- Consistency: Every generated structure adheres perfectly to the rules you've defined, ensuring uniformity across your build.
Demystifying the Generator: How Scripting Builds Your World
The core concept is simple: you use Lua code to mimic the actions you'd take manually, but at an automated, highly efficient scale.
Prerequisites for Programmatic Building:
Before diving in, you'll want a solid foundation:
- Basic Lua Scripting: Understand variables, data types, control structures (loops, conditionals), functions, and tables.
- Roblox Studio Fundamentals: Be comfortable with the interface, the Explorer (where objects are listed), the Properties window (where object attributes are changed), and 3D navigation.
- Roblox API Basics: Know how to interact with Roblox objects (Parts, Models, Folders) through code, including their properties (Position, Size, CFrame, Material) and methods (
Instance.new(),Destroy(),Clone()). - Object-Oriented Programming (OOP) Concepts: While not strictly mandatory for basic generators, understanding OOP can make complex systems much more organized and maintainable.
The Genesis of a Generator: Immediate Actions
- Create a Single Part Programmatically: Insert a
ScriptintoServerScriptService(orWorkspacefor simpler tests). A simple line likelocal newPart = Instance.new("Part"); newPart.Parent = workspace; newPart.Size = Vector3.new(4, 4, 4); newPart.Position = Vector3.new(0, 2, 0); newPart.Anchored = true;will create a basic cube. This is your foundation. - Generate a Row of Parts with a Loop: Expand on the first step by using a
forloop to create multiple parts in a line, incrementing theirPositionslightly with each iteration. This introduces automation. - Craft a Simple Wall Function: Encapsulate the part creation logic into a function that accepts parameters like position, size, and material. This modularity is key for scaling up. For instance, a
createWall(position, size, material)function can then be called repeatedly to form a room.
Building Smarter: Essential Generator Architecture
A robust generator programmatically constructs complex structures from simple, reusable building blocks.
- Helper Functions: Start with a utility function like
createPart(position, size, material, color, parent)that handles the basicInstance.new("Part")call and property assignments. This keeps your main generation logic clean. - Fundamental Elements: Build dedicated functions for specific structural components:
generateWall(startPos, endPos, height),generateFloor(minX, maxX, minZ, maxZ),generateCeiling(),addDoor(wallPart, doorSize),addWindow(wallPart, windowSize). - Room Encapsulation: Create a
generateRoom(cornerPosition, dimensions, doorLocations, windowLocations)function that internally calls your wall, floor, and ceiling functions. This makes your building highly modular. - Openings: For doors and windows, you can simply set
Part.CanCollide = falsein a wall segment and place a frame around the opening. More advanced techniques involve usingUnionandNegateparts (Boolean operations) for precise cutouts, though these are more computationally intensive. - Assembly Logic: To build entire condos or complexes, you'll often use a grid-based approach or define connections between rooms. A 2D array could represent your floor plan, with each cell dictating a room type or a hallway.
- Adding Details: Furniture and decorations can either be pre-made
Models cloned fromReplicatedStorageor procedurally generated using yourcreatePartlogic, perhaps with random variations in color or position.
Turbocharging Your Builder: Performance Optimization for Generators
Procedural generation, while powerful, can be resource-intensive. Generating thousands of parts rapidly can lead to lag, high memory usage, and poor game performance. Optimizing is crucial.
- Batch Part Creation: Minimize the number of times you parent individual parts directly to
Workspace. Instead, create all parts in a loop, parent them to a temporaryModel, and then parent the completeModeltoWorkspaceonce all parts are inside. This reduces render updates. - Anchoring is Non-Negotiable: For all static structural elements (walls, floors, ceilings, furniture), always set
part.Anchored = trueimmediately after creation. This prevents physics calculations for stationary objects, dramatically improving performance. - Collision Fidelity Matters: For non-critical, decorative shapes, set
Part.CollisionFidelitytoBoxorHullinstead ofDefaultorPreciseConvexDecomposition. This simplifies the physics engine's work, reducing overhead. - Embrace Streaming Enabled: For very large worlds, enable
StreamingEnabledin yourWorkspaceproperties. This feature loads parts only when players are near them, significantly reducing initial load times and memory usage for vast generated environments. - Part Count Reduction: Where possible, use larger parts instead of many small ones to form structures. For instance, one long wall part is better than ten smaller wall segments that achieve the same visual effect.
- Meshes/Unions for Complexity: For highly detailed or complex shapes that you need to replicate (e.g., ornate pillars, intricate window frames), create them once as a
MeshPartor aUnionin Studio, then clone these pre-optimized objects in your script rather than generating numerous individual parts.
Common Generator Gotchas and How to Dodge Them
Even seasoned scripters can trip up. Here's how to avoid common pitfalls:
- Incorrect Part Positioning/Sizing: Parts frequently overlap or have frustrating gaps.
- Avoidance: Remember
Part.Positionrefers to the part's center. Always account for half the part’sSizewhen calculating offsets to place parts edge-to-edge. UseCFramefor precise transformations that combine position and rotation. - Parenting Issues: Generated parts might scatter randomly, disappear, or fail to group.
- Avoidance: Always create an
Instance.new("Model")first, parent all generated parts to thisModel, and then parent the completeModeltoWorkspace. This ensures atomicity and proper grouping. - Performance Overheads: Lag, low FPS, or high memory usage.
- Avoidance: Implement all optimization strategies discussed above. Profile your game using Roblox’s Developer Console (F9) to identify bottlenecks.
- Lack of Modularity: Leads to monolithic, unmanageable scripts.
- Avoidance: Break down your logic into small, focused functions (e.g.,
createPart,generateWall,generateRoom). Each function should ideally do one thing well. - Hardcoding Parameters: Makes your generator inflexible and difficult to reuse.
- Avoidance: Design functions to accept parameters for configurable properties like dimensions, materials, colors, and layouts. This makes your generator versatile.
- Forgetting to Anchor Parts: Causes your meticulously built structures to collapse into a heap.
- Avoidance: Set
part.Anchored = truefor all static structural elements immediately after creation. Make this a default in yourcreateParthelper function, or add a parameter to toggle it.
Best Practices for Robust, Reusable Generators
Building a generator is an investment. Following these practices ensures your code is maintainable, scalable, and effective.
- Modular Design: Use small, single-responsibility functions (e.g.,
createCube,createDoorway,assembleRoom). - Parameterization: Design functions with parameters instead of hardcoded values, making your generator highly configurable.
- Use Models for Grouping: Group related parts into
Models for better organization in the Explorer and improved performance during manipulation. - Anchor Static Parts: Make
part.Anchored = truea default for any structural element. - Optimize for Performance: Be mindful of
Instance.new()calls, use appropriateCollisionFidelity, considerStreamingEnabled, and prioritize reducing overall part count where possible. - Error Handling: Implement checks for invalid parameters (e.g., a room dimension of zero) to prevent script crashes.
- Clear Naming Conventions: Use descriptive names for variables, functions, and objects.
wallPart_Northis clearer thanp1. - Version Control: If working on a team or complex project, use systems like Git to track changes and collaborate effectively.
- Comment Your Code: Explain complex logic, design decisions, and the purpose of functions. Your future self (and collaborators) will thank you.
- Test Incrementally: Generate and test small sections (e.g., a single wall, then a room) before integrating them into the full generation process.
Manual vs. Generators: Which Path Should You Take?
The choice between manual and generator building isn't about one being inherently "better" but rather about which method aligns best with your project's scope, your skill set, and your creative priorities.
Decision Matrix: Comparing the Methods
| Feature | Manual Building | Procedural Generation (Generators) |
|---|---|---|
| Speed | Slow for large or repetitive projects | Extremely fast for large, repetitive, or complex projects |
| Scalability | Poor; difficult to expand or replicate | Excellent; easily scales to entire cities |
| Uniqueness | High; allows for bespoke, intricate designs | Moderate to High; unique variations require more complex scripts, but patterns are common |
| Learning Curve | Low; intuitive, immediate results | Moderate to High; requires Lua scripting skills |
| Consistency | Can be inconsistent across many similar items | Very high; perfectly consistent based on script rules |
| Maintenance | High for widespread changes; low for localized fixes | Low for widespread changes (edit script); high for unique adjustments |
| Project Size | Best for small to medium-sized projects | Best for medium to very large-scale projects |
| Detailing | Best for fine-tuned, unique details | Good for structural details; finer details often manual |
| Flexibility | High for artistic flow; low for rapid redesigns | High for rapid redesigns (change parameters); low for spontaneous deviations |
Hybrid Approaches: The Best of Both Worlds
For many developers, the most effective strategy isn't an either/or but a blend. This "hybrid approach" leverages the strengths of both methods:
- Generate the Structure, Manually Detail: Use a generator to quickly lay out the core architecture—walls, floors, basic room shapes. Then, switch to manual building to add unique furniture, intricate textures, custom lighting, and personalized decorations. This gives you speed for the foundation and artistic freedom for the finish.
- Generate Details, Manually Place: Create a generator that churns out varied furniture pieces, rock formations, or trees. Then, manually place and arrange these generated assets within your scene. This adds variety without the tedium of individual part creation.
- Modular Generation: Design generators for specific, reusable modules (e.g., a "kitchenette generator," a "bathroom pod generator"). Then, manually arrange and connect these modules to form unique condo layouts.
Real-World Application: When and Why Developers Choose Each Method
Understanding the theory is one thing; seeing it in action helps solidify the choice.
Case A: The Boutique Roleplay Cafe (Manual Building)
Imagine a developer crafting a highly detailed, intimate roleplay cafe. Every pastry on display, every unique chair, and every subtle lighting fixture contributes to a specific aesthetic and atmosphere.
- Why Manual? The core goal is uniqueness and immersion. A generator would struggle to capture the bespoke charm of uneven brick textures, custom-designed cafe furniture, and specific art pieces. The project size is manageable (one cafe), and the developer prioritizes artistic control over raw speed. Each detail is handcrafted to evoke a specific feeling, making manual placement the superior choice.
Case B: The Sprawling City Apartment Complex (Generator Building)
A developer needs to create a vast, living city with hundreds of varied apartment buildings, each containing multiple rooms. Manually building each one would take months, if not years.
- Steps Implemented (from provided context):
- Define Core Room Types: Functions like
StudioApartment(),OneBedroom(),TwoBedroom()were created, each calling a genericgenerateRoom()function with specific dimensions and furniture configurations. - Layout Blueprint: A 2D array was used to represent each floor's layout, mapping cells to room types or empty spaces.
- Vertical Stacking Logic: A main function iterated through floors and the blueprint, calling room generation functions. It calculated
CFramevalues based on position and height, ensuring rooms stacked correctly and adding connecting doors. - Exterior Facade Generation: A separate function handled exterior walls, roofs, and windows. It used checks to identify "exposed" wall segments for window placement and a consistent architectural style.
- Performance Optimization: All parts were anchored immediately, rooms grouped into
Models, and entire floors into largerModels. Materials were set efficiently to minimize render calls.
- Outcome: An entire city block of unique apartment buildings was generated in minutes. This allowed the developer to focus on gameplay mechanics and easily create variations by modifying input parameters like building height, number of rooms, or architectural style, without endless manual labor.
Navigating the Common Headaches: Troubleshooting for Both Methods
No matter your chosen method, you'll encounter snags. Here's a quick troubleshooting guide:
- Parts Fall/Collapse: This is almost always due to forgetting to anchor. For both manual and generated parts, ensure
Part.Anchored = true. - Overlapping/Gaps:
- Manual: Double-check your
MoveandScaletool snap increments. - Generator: Review your
Part.PositionandPart.Sizecalculations. Remember to account for half the part's size when offsetting. UseCFramefor more robust positioning. - Ungrouped Parts/Unmovable Blob:
- Manual: Select all related parts in the Explorer and press Ctrl+G to group them into a
Model. - Generator: Ensure you are creating an
Instance.new("Model")and parenting all generated parts to it before parenting the model toWorkspace. - Lag/Crashes:
- Both: Ensure all static parts are anchored.
- Generator: Reduce part count by using larger parts or
MeshParts/Unions. SetCollisionFidelitytoBoxorHullfor non-critical parts. ConsiderStreamingEnabledfor vast worlds. Profile with F9. - Nothing Appears in Workspace:
- Manual: Check if parts are too small to see, or if they are off-camera.
- Generator: Double-check that
part.Parentis correctly assigned to an existing, accessible object withinWorkspace. Look for script errors in the Output window (View > Output). attempt to index nilerrors (Generator Specific): This means you're trying to access a property or method of an object that doesn't exist.- Avoidance: Verify that the result of
FindFirstChild()or similar lookup functions is notnilbefore trying to use it.
Your Burning Questions Answered: FAQs
What exactly is a Roblox condo generator?
It's a Lua script that programmatically creates complex building structures in Roblox Studio, automating the entire construction process based on predefined rules and parameters.
Why should I use procedural generation instead of building manually?
Procedural generation offers immense speed, consistency, and scalability for large or repetitive structures. It allows for rapid variations by changing script parameters and can create dynamic, evolving worlds. Manual building is generally better for highly unique, artistic, one-off designs.
What level of Lua knowledge do I need for a generator?
Basic to intermediate Lua scripting is usually sufficient for simple generators. For more complex, robust, and optimized systems, familiarity with object-oriented programming (OOP) concepts is highly recommended.
Can I generate custom furniture or decorations with a generator?
Yes! You can either use your createPart logic to build furniture from scratch procedurally, or more commonly, clone pre-made MeshParts or Models (which you might have created manually or sourced from the toolbox) and place them using your script.
How do I make generated condos unique and not just copy-pasted?
Introduce randomness using math.random() for properties like part sizes, colors, materials, or even furniture placement. You can also define different "styles" (e.g., modern, classic, rustic) as input parameters to your generator, causing it to use different sets of materials, dimensions, or furniture layouts.
What are the performance implications of using a generator?
Generating thousands of individual parts can lead to significant lag, low FPS, or high memory usage. This can be mitigated by immediately anchoring static parts, grouping parts into Models, using appropriate CollisionFidelity, enabling StreamingEnabled for large worlds, and reducing overall part count where possible.
Can these generation principles extend to outdoor environments like terrain, trees, or rocks?
Absolutely! The core principles are the same. You adapt the createPart logic to create terrain chunks, trees, or rock formations. You'd often use mathematical functions like Perlin noise to generate natural, organic-looking variations in height, density, and placement.
How do I save the condos once they've been generated?
Once your generator has finished creating the structure in Workspace, you can right-click on the main Model (or individual Models if you've grouped them) in the Explorer window and select "Save to Roblox..." to save it as a model asset, or "Save to File..." to save it as a .rbxm file on your computer.
Is it possible to generate complex, non-rectangular shapes?
Yes, but it's more challenging. It often requires advanced geometry techniques like Boolean operations (Union and Negate parts) for precise cutouts, or creating custom MeshParts in external 3D modeling software (like Blender) and then importing and cloning them with your script.
Can I make an interactive generator for players to use in-game?
Definitely! You would create a User Interface (UI) in StarterGui with input fields for players to enter parameters (e.g., room size, color). Then, you'd use RemoteEvents to send these parameters from the client (player's UI) to a server script, which would then execute the generation code in Workspace.
If I want to update my generated condos, do I have to regenerate them completely?
For major structural changes, regenerating is often the easiest. You can simply destroy the old model and run the generator with updated parameters. For minor modifications, you could write specific functions to target and modify certain parts of an existing generated model, but this adds complexity to your script.
Beyond the Basics: Your Next Steps in Roblox Condo Building
The journey of building in Roblox Studio, whether by hand or by code, is one of continuous learning and creation. You now have a solid understanding of both manual methods and the powerful potential of generators for Roblox condo building: manual methods vs. generators. The most powerful approach often lies in a hybrid strategy, combining the speed of automation with the finesse of manual detailing.
- For Manual Builders: Focus on honing your eye for detail, experimenting with advanced building techniques (like using negative parts for cutouts), and mastering grouping and organization. Study existing high-quality models for inspiration.
- For Aspiring Scripters: Dive deeper into Lua scripting, focusing on modularity and parameterization. Start with small generation projects and incrementally add complexity. Explore concepts like noise functions for organic variations, and look into open-source generators for learning.
- Embrace the Hybrid: Don't be afraid to use a generator for the mundane, repetitive tasks and reserve your manual efforts for the unique, signature elements that make your condo truly stand out.
No matter your path, consistent practice, experimentation, and a passion for creation will be your greatest tools. Happy building!